By clicking figures with an asterisk * you can enlarge them to see more detail. Return to the text using the back arrow.
This post is preceded by “Restoration of an early C19 ebony quadrant”, “C Plath battery handle structure; “C Plath sextant lives again”; “C Plath Micrometer Sextant”; “A Damaged Rising Piece”, “SNO-T Mirror Bracket Repair”, “A Worm Turns”, “The case of the broken screw”, and “Worm with wrong thread angle?”

Frontispiece*: Before.
Recently I acquired a 1940’s sextant by Observator of Rotterdam which I knew was not perfect, but the extent of the imperfections did not become fully apparent until it arrived about two weeks ago. The seller had very fairly pointed out a broken leg and a broken peg on the device that is supposed to secure the instrument in its case (Figure 1), and the absence of mirrors and their clips was evident from the photographs. Unfortunately, the second peg of the securing device gave way while in transit, so that the sextant rattled around in its case and the horizon mirror bracket got distorted (Figure 4), the telescope rising piece got both twisted and bent and the micrometer worm shaft got seriously bent (Figure 6).
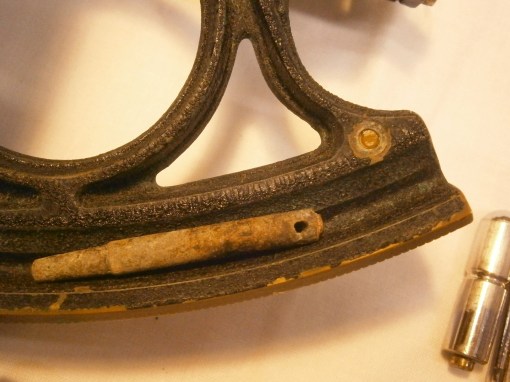
Figure 1: Broken leg and peg as found
I have dealt with how to mend broken legs, using this instrument as an example, in my post of 7 October 2016, Mending Broken Legs, so will not write any more about it here.
The pegs on the securing device were riveted into a plate which was screwed firmly to the base of the case (Figure 2) and all that was needed to re-secure them was to clean up their bases and, using the ball of a ball-pein hammer, to rivet them back in their holes.

Figure 2: Device for holding sextant in its case.
The device is not well suited to its task. The pegs each pass through a hole in the handle of the sextant and, projecting into the upper holes which is lined with a brass bush is a spring-loaded pin (Figure 3). This latter is supposed to engage in a groove in the upper peg, but, while it may locate the sextant, it does not secure it very well. I plan to add a couple of wooden buttresses to the lid of the case, so that when it is closed the sextant will be held securely.

Figure 3: Spring-loaded pin that “secures” sextant.
The distorted horizon mirror bracket (Figure 4) had most of the distortion removed by giving a squeeze in a vice and then a few well-directed blows with a soft-faced punch did the rest

Figure 4: Distorted horizon mirror bracket.
The extent of the damage to the telescope rising piece is not immediately apparent from Figure 5, though with a little imagination, a twist is apparent, and it was certainly obvious that the telescope was not pointing towards the horizon mirror. The objective lens was also canted downwards so that instead of clearing the index arm, it was jammed against it. Straightening the part simply involved removing the telescope and its ring and placing first the square upright in the vice to untwist the soft brass, followed by clamping the ring to straighten the upright in two dimensions.
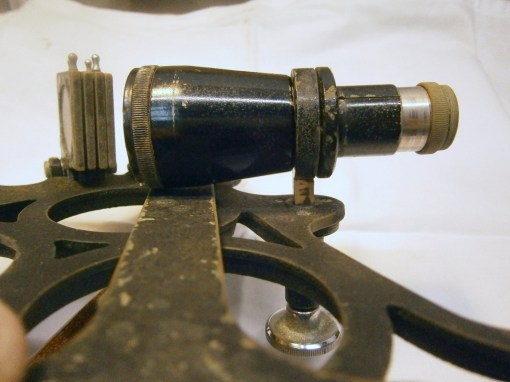
Figure 5: Bent telescope rising piece.
Straightening the micrometer shaft was altogether more complex, as not only was the shaft bent, but the bracket that holds the index was also distorted (Figure 6).

Figure 6: Bent micrometer worm shaft.
A brief account of the micrometer mechanism will perhaps help the reader to appreciate the problem better. The parallel worm lies between two reduced portions of its shaft and the walls of each reduced portion are conical in shape. The parallel parts of the shaft that lie between the conical portions make no contact with the bearings. Only the conical parts do so and, if properly made, by no means a simple task, when assembled all axial and radial play is removed while still allowing the shaft to rotate freely (Figure 7). For an account of making a similar new micrometer shaft and worm, see my post of 6 July, 2009, A Worm Turns.
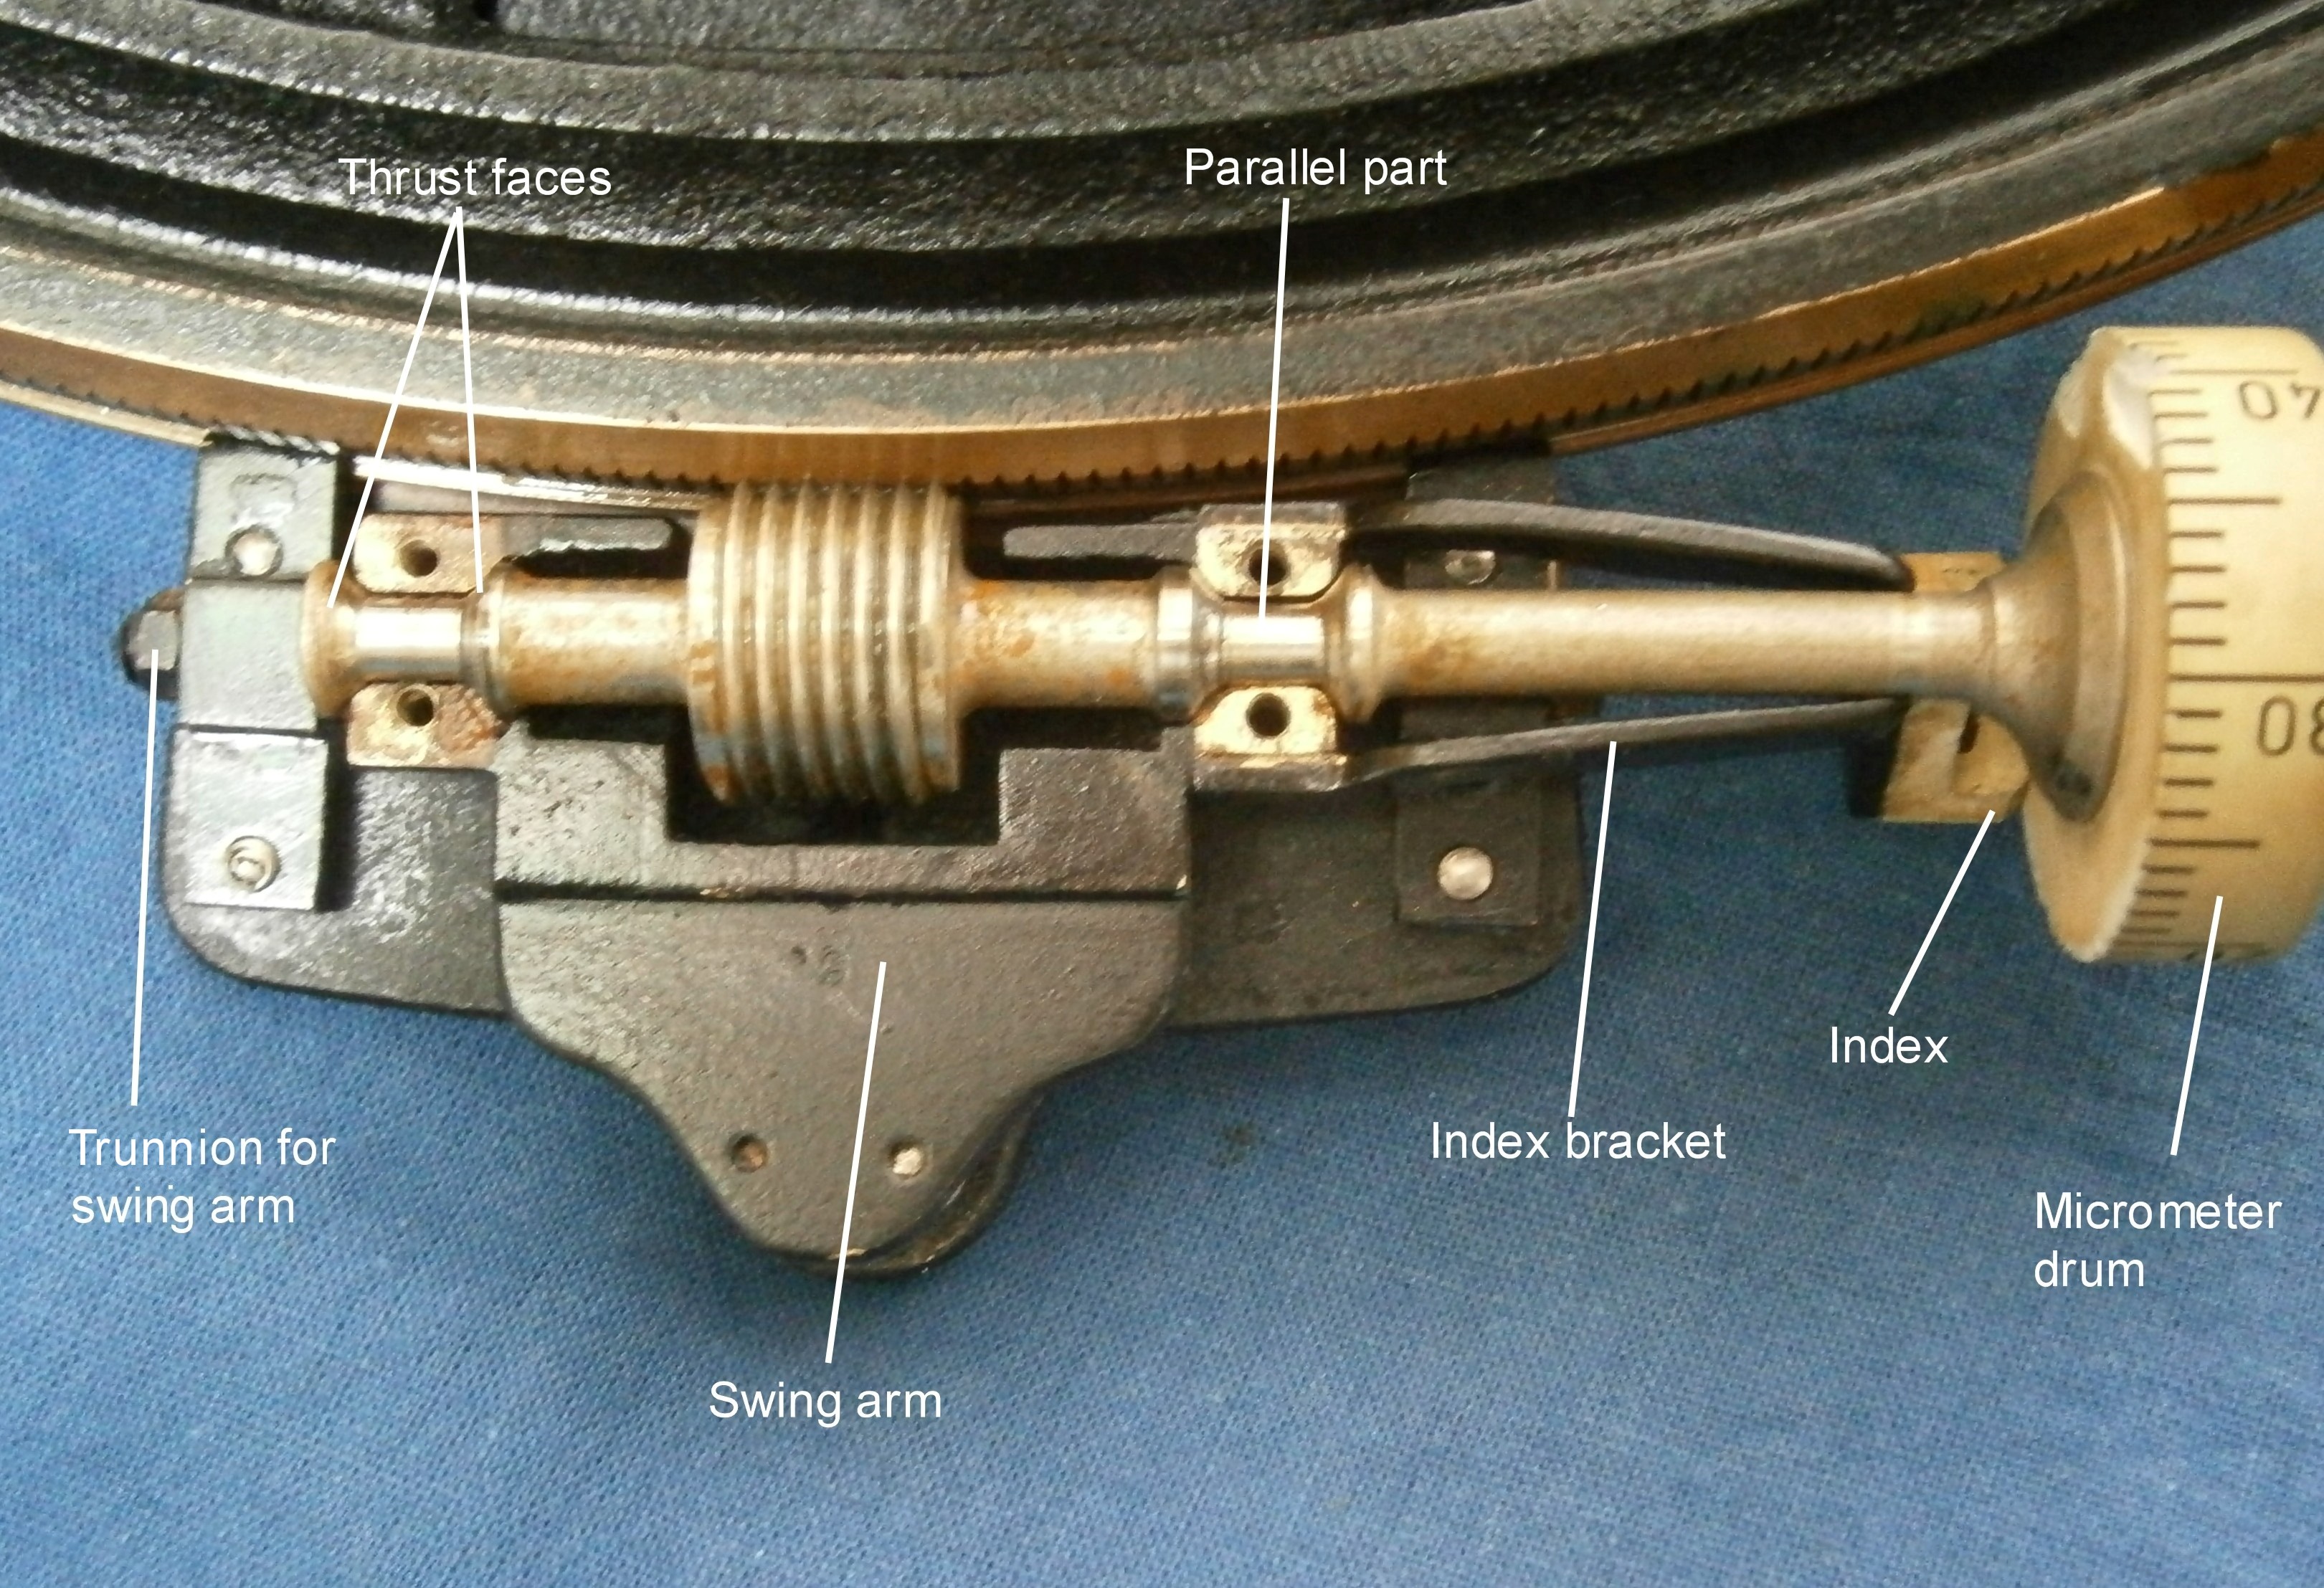
Figure 7*: Micrometer shaft in its bearings
The bearings form part of what I have chosen to call the swing arm, a brass casting that is held between two trunnions in the form of screws with hardened, conical ends, that allow the arms and the included micrometer worm to swing in and out of engagement with the rack against the pressure of a leaf spring (Figures 8 and 10). Note how the index of the micrometer drum is carried on a slender bracket that is attached to the sides of the front bearing.
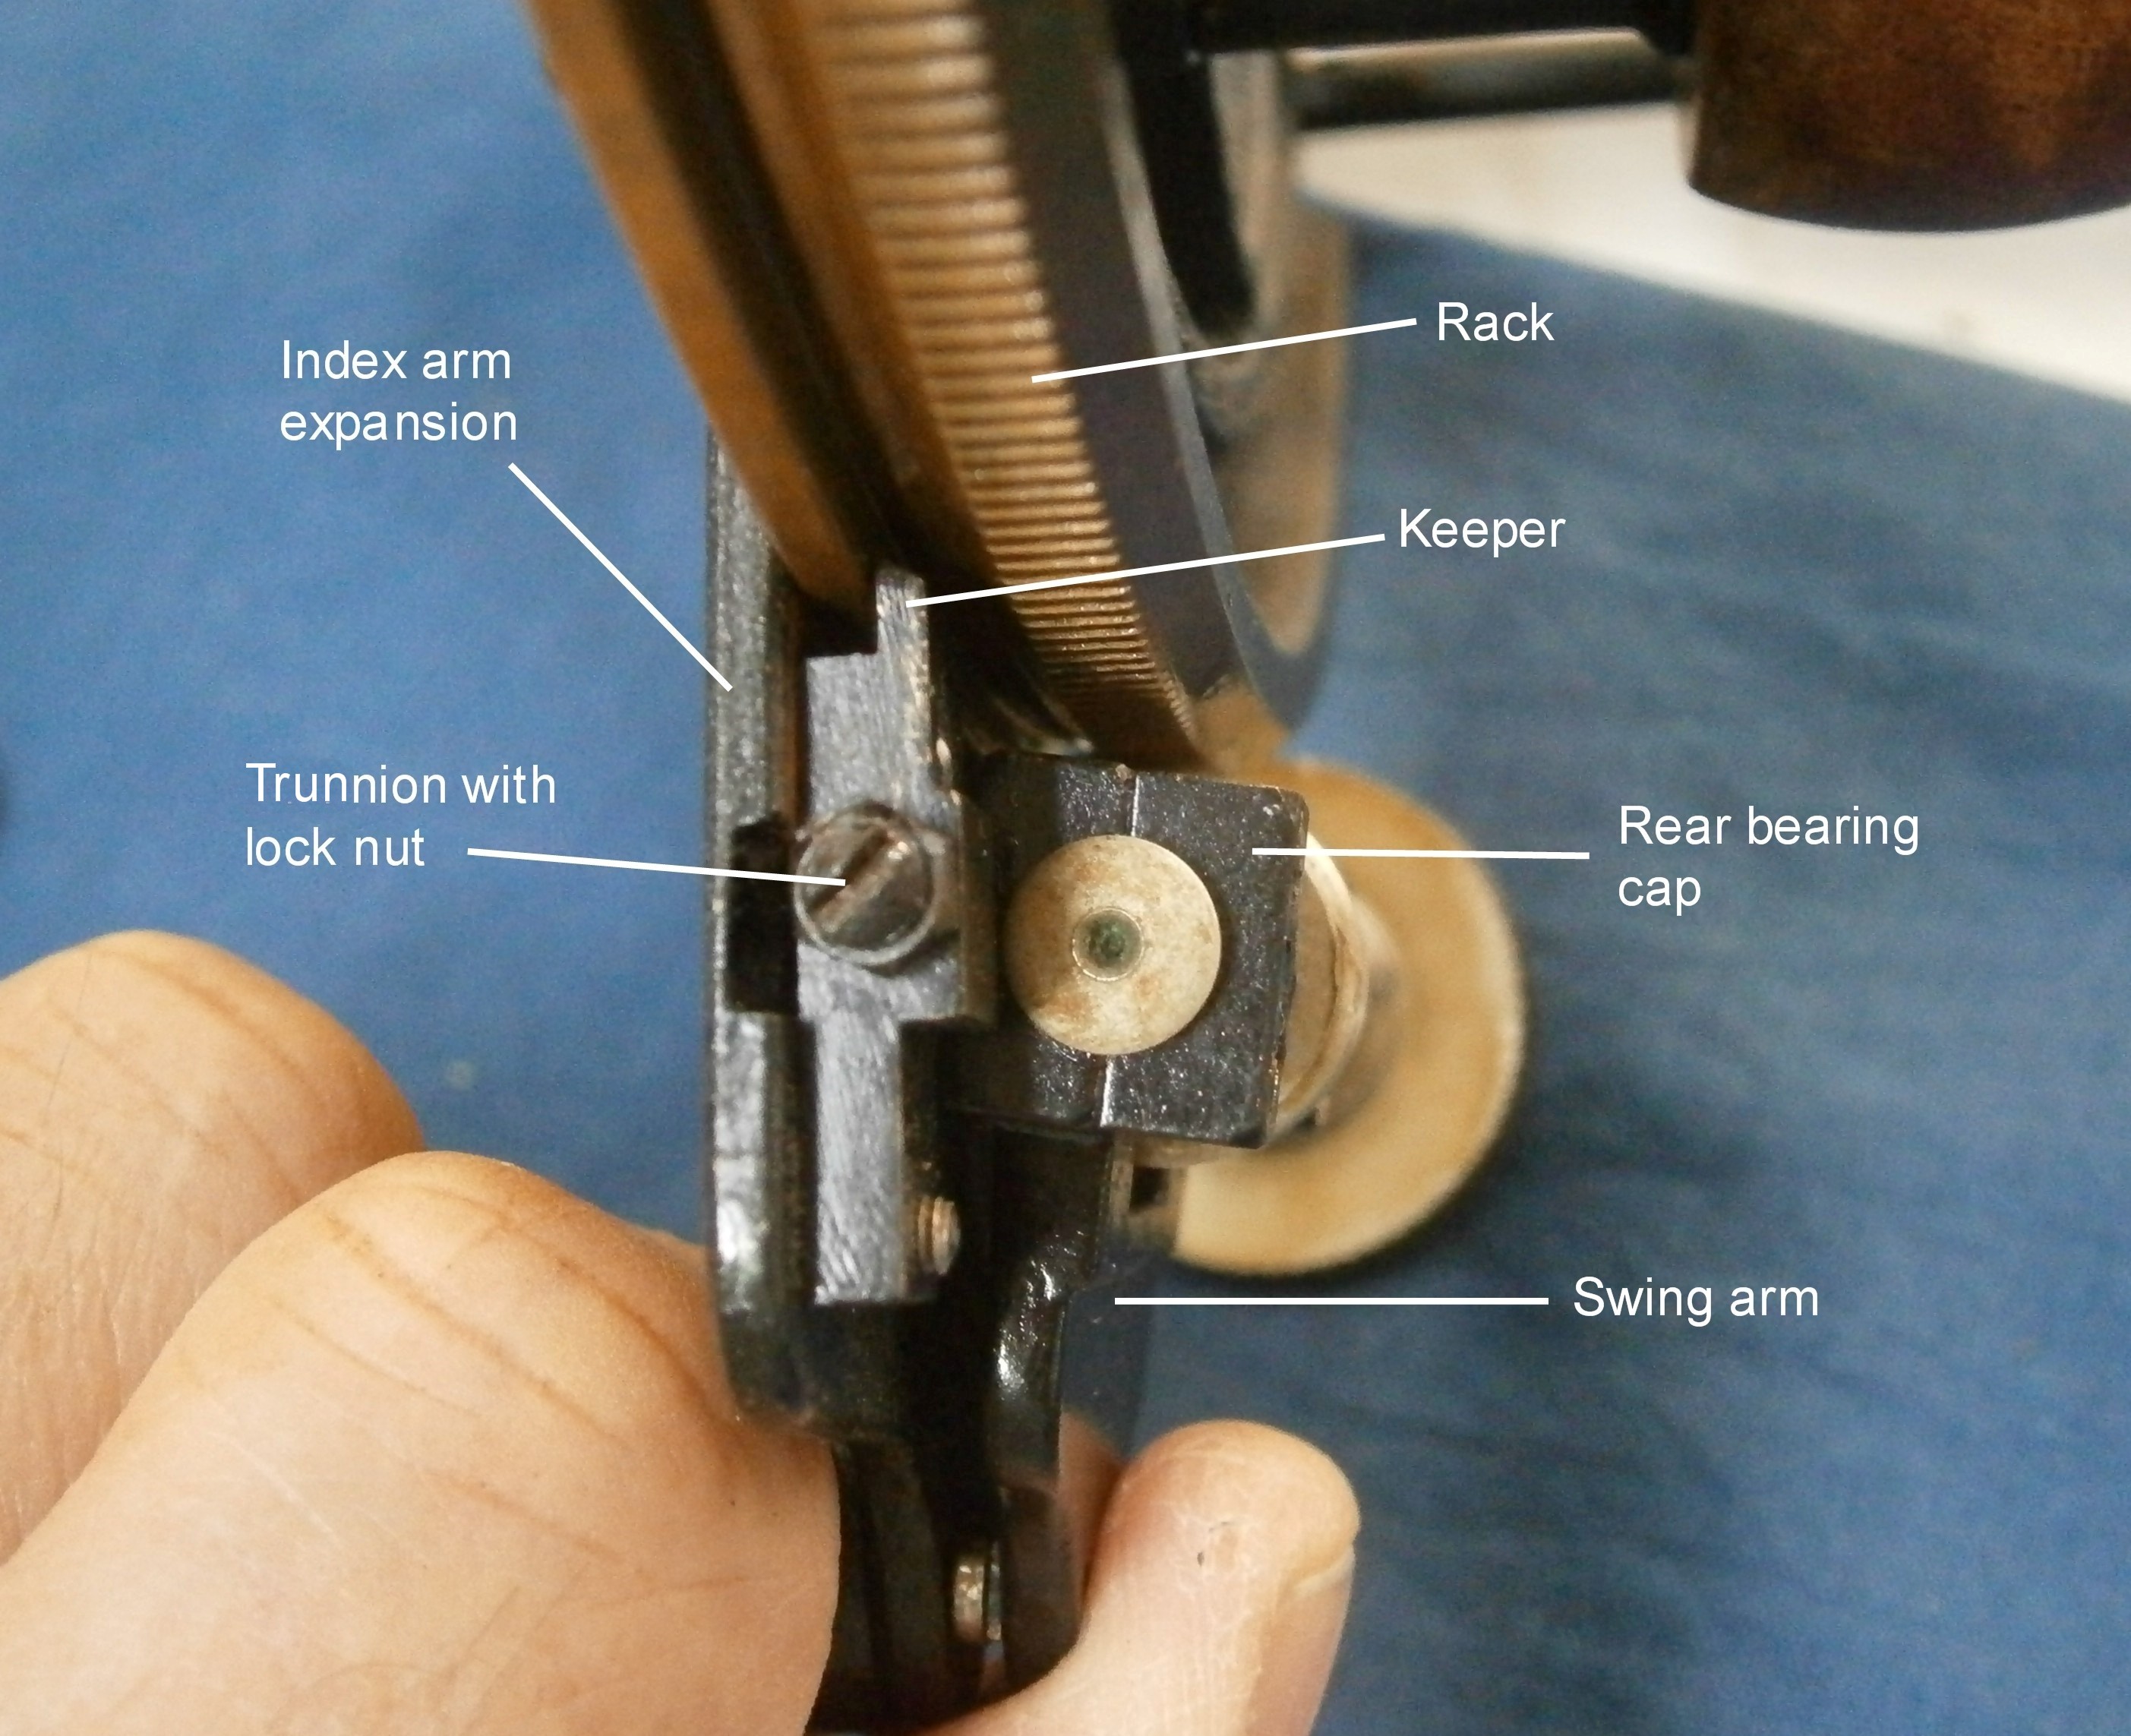
Figure 8*: Swings arm and trunnion.
The trunnions are adjustable to allow all play to be taken up while allowing free rotation. The trunnions are then locked in place by means of lock nuts. The blocks in which they run are extended to form keepers that prevents the index arm from lifting off the frame.
When straightening a bent shaft it is difficult to ensure that one does not end up with two bends in opposite directions, but in this case, the bend took place at the narrow parallel portion of the shaft that is not normally in contact with the bearing and which takes no part in its alignment. Figure 9 shows one way to straighten the shaft to restore its alignment with the worm.

Figure 9: Straightening the shaft under control.
The 15 mm diameter worm is held in an ER collet in the spindle of my milling machine and a 90 degree vee block is held in the machine vice as a guide to alignment. While the shaft rotates slowly, the position of the block is adjusted so that the point of maximum eccentricity is aligned midway between the sides of the bloc, when rotation is stopped and the machine table moved to give the shaft a nudge in the right direction. The shaft is alternately rotated and nudged until no eccentricity can be detected in the part of the shaft that carries the micrometer drum.This of course only guarantees that the drum and the worm are concentric, but these are the important alignments. While some slight eccentricity of the front bearing remained, it was of the order of only 0.03 mm.
The index bracket had taken on a curious shape and in trying to straighten it, it became partially detached from the side of the front bearing. As it had been soft soldered into place, I completed the detachment by heating with a small flame and this allowed me to straighten its slender sides using a combination of vice and punch. T
his then left me the problem of re-attaching it so that the index would be correctly aligned. Figure 10 shows how I did this (note too how this photo shows the trunnions and their mountings clearly).

Figure 10*: Soldering jig.
I first turned up a bush of the same diameter as the micrometer drum to fit in place of the drum, and of a length equal to the combined thickness of the drum plus index. I then bored out one end of the bush to a depth equal to that of the thickness of the index. When in place (Figure 11) the bracket could then be clamped to it in the correct orientation and the arms of the bracket sweated back into place with soft solder.

Figure 11: Soldering jig in place.
Happily, when the micrometer mechanism was re-assembled, everything ran smoothly, but when I next have an auto-collimator out on my surface table I will check for eccentricity errors of the drum. None is visible to the naked eye. In the course of dismantling the index shades for painting and lubrication, the head of the (steel!) screw that prevents the shades mounting shaft from rotating broke off, leaving me with one last task, that of drilling out the broken screw and fitting a new brass one (Figure 12). The process is the same as for drilling out broken legs.
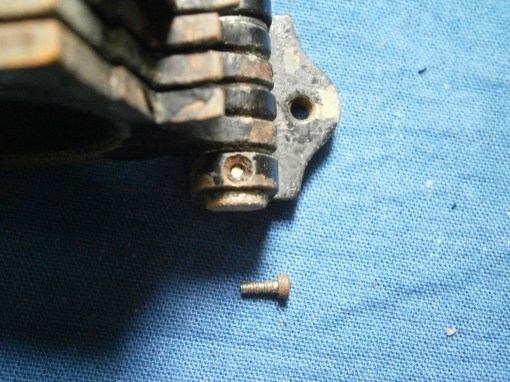
Figure 12: Broken screw and its replacement
After making new mirrors (Posts of 11 February 2009 and 27 March 2011) and clips, all that remained was to take everything apart, clean, strip and respray everything, re-assembling, greasing and oiling where appropriate, and to re-finish the mahogany case (Figures 13 and 14).

Figure 13*: Finished sextant in its case

Figure 14 * Rear face of finished instrument.
If you have enjoyed reading this blog post, you will probably enjoy owning a copy of my book, “The Nautical Sextant“. You may also enjoy reading my book “The Mariner’s Chronometer” Both are available through Amazon, Paradise Cay and Celestaire.

Leave a comment