This post is preceded by “A Countinho-Pattern Bubble sextant’; “How to Refill C Plath Bubble Artificial Horizon”; “The SOLD KM2 Bubble Sextant”; “C Plath Bubble Horizon Attachment”;“A gummed up AN5851-1 averager”, “Bubble illumination of Mk V and AN 5851 bubble sextants” , ”Refilling Mark V/AN5851 bubble chambers” , ”Overhaul of MkV/An5851 bubble chamber” , ”AN5851-1 : jammed shades carrousel” , ”A Byrd sextant restored” , ”Update on Byrd Aircraft Sextant”, “A nautical sextant bubble horizon” and “Sealing A10 vapour pressure bubble chambers.”

Figure 1: MA 1 light path diagram.
Figure 1 shows the light path diagram for the MA 1 aeronautical sextant click on it to enlarge). Its near relative, the MA 2 uses a spirit level as a horizontal reference, but the MA 1 uses a mirror whose surface is maintained horizontal by a hanging weight damped in fluid. Light from a bulb passes through a condenser lens system, through an orange-coloured reticle, through a thin transparent membrane or pellicle, through an objective lens and then is reflected off the mirror. On its return path it is reflected off the under surface of the pellicle into the eyepiece.
Rays from the observed object pass via the index prism and an objective lens system, are deflected through 90 degrees by a pentaprism and then pass via another reticle into the eye piece in such a way that the black lines of the object reticle, the orange lines of the mirror reticle and the observed object may be in view together. The object is kept in coincidence with the orange reticle, as far as possible in the centre of the field of view, as indicated by the object reticle.
The pellicle was probably made from flexible collodion, a substance based on nitro-cellulose that forms an exceedingly thin film, but which suffers from the disadvantage of being very delicate and prone to distortion and wrinkling if it becomes damp. Forty-odd years after manufacture, the dry nitrogen with which the instrument was filled has often been replaced by air and the dessicator has become saturated with water, so that the image of the orange reticle becomes distorted by wrinkles. While very thin transparent plastic films are now available in the form of food wrap, it seems to me to be much simpler to replace the pellicle by a microscope cover slip. Its thickness is about 0.14 mm and so light is reflected off both surfaces of the glass to give a double image of the horizontal reticle line. This is not necessarily a disadvantage, as it is easier to place an image of a star between lines than it is to superimpose the image upon a single line, though motion of the aircraft is likely to make this a moot point.
There is a method using food wrap and I include it as an appendix.
The first step is to remove the dessicator by withdrawing two countersunk screws circled in white in Figure 2. This makes it slightly easier to remove the left side of the instrument together with the shades mechanism and also allows the dessicant to be refreshed if the granules are pink or white. The end of the dessicator unscrews and the granules can then be tipped out onto a shallow tray and baked in an oven at 120 Celsius for 20 minutes or until they have regained a blue colour.
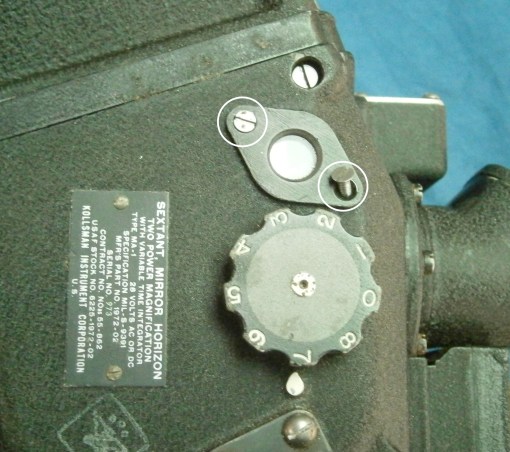
Figure 2: Remove dessicator.
Then the four corner screws are removed as shown in Figure 3. Remove the screws completely before attempting to lift off the side cover. Then lift the rear of the cover a few millimetres and slide the cover backwards for a few millimetres, to avoid fouling the shades mechanism on the frame.
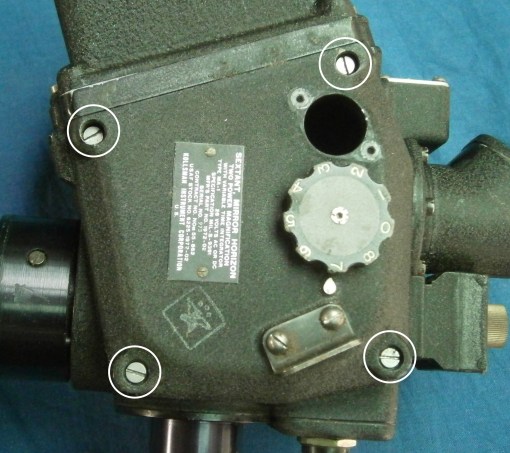
Figure 3: Remove left cover.
This exposes the pellicle on its frame. Removal of two screws allows it to be lifted out for inspection, holding it by its edges (Figure 4).

Figure 4: Remove pellicle frame.
If the pellicle appears to be flat and undamaged, dust particles may be removed by gently blowing dry air on to it or by very light brushing with a soft camel hair brush. If you are ham-handed it is better to leave dust in place rather than risk damage to an intact pellicle. If, however, the pellicle is broken or wrinkled, remove its remains with a finger nail and then clean the front machined surface with ether solvent. It is then a simple matter to place three tiny drops of super glue on the frame and, using tweezers, to glue a microscope cover slip in place (Figure 5). A nicely worded request for a small handful of cover slips is unlikely to be refused at your local medical laboratory. They are perfectly clean as they come from the maker, so try to keep them that way.

Figure 5: Replace pellicle with cover slip.
Figure 6 shows the eyepiece view after replacing the pellicle with a cover slip.
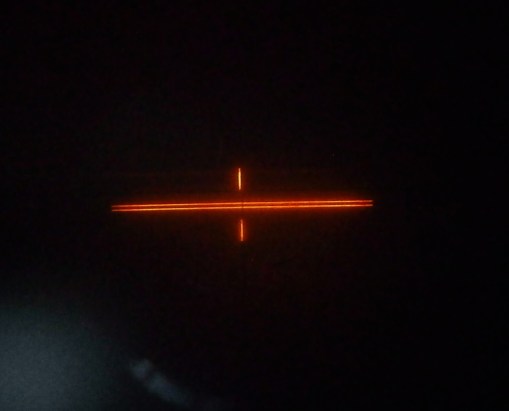
Figure 6: View through eyepiece, using cover slip as semi-reflective mirror.
APPENDIX
Using food film as a pellicle replacement is slightly more difficult:
1) Obtain a circular embroidery frame such as may be had for a very few dollars and stretch a piece of food film (Clingwrap, Gladwrap etc) over it, adjusting the frame until the film is perfectly flat and wrinkle free. Make sure that it is perfectly clean and free from finger marks.
2) After cleaning old pellicle off the frame, place a smear of two-part epoxy adhesive (e.g. Araldite) around the frame, just outside the flat machined area, avoiding placing adhesive on the flat surface itself.
3) Set the frame down on the centre of the film, adding a weight of a few hundred grams to hold it in place until the adhesive dries. Then trim off excess film with sharp nail scissors or the like.

Leave a comment