Adapting to LEDs 2: C Plath Bubble Horizon Unit.

4 09 2013

In this category this post was preceded by one on adapting miniature screw bases to LEDs

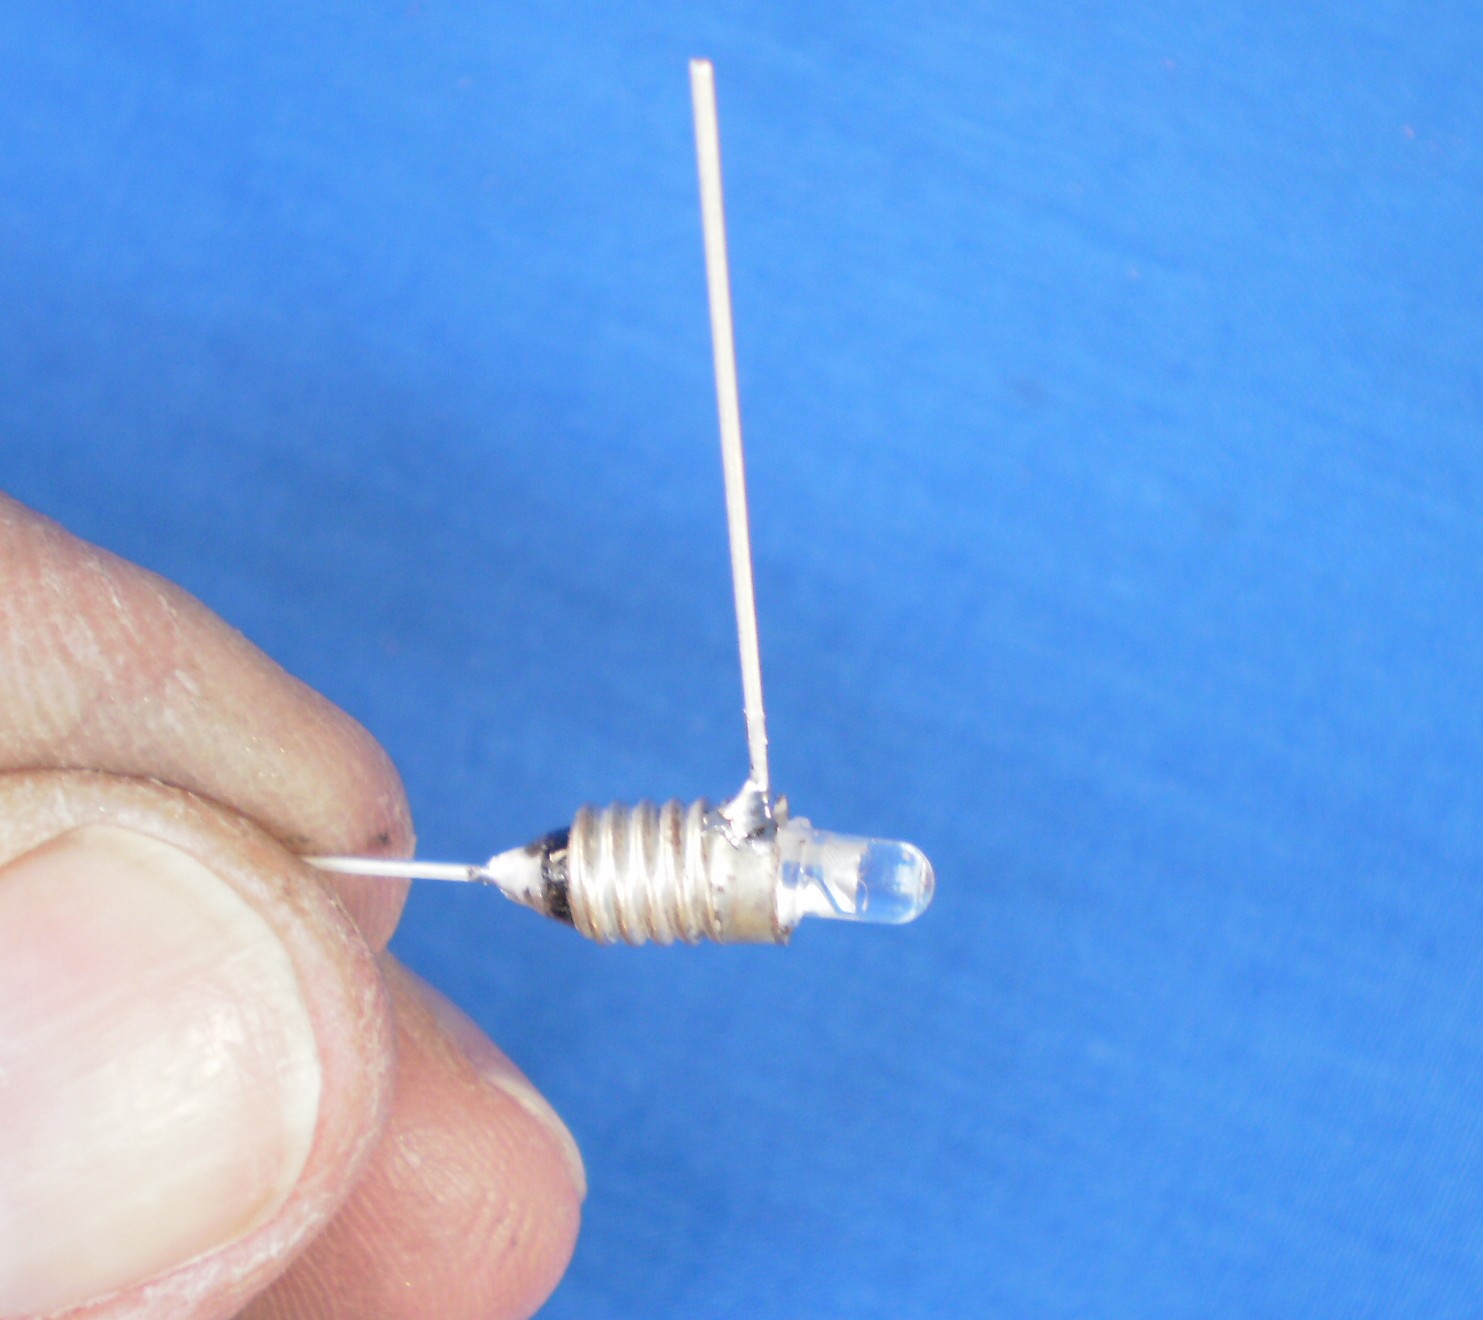
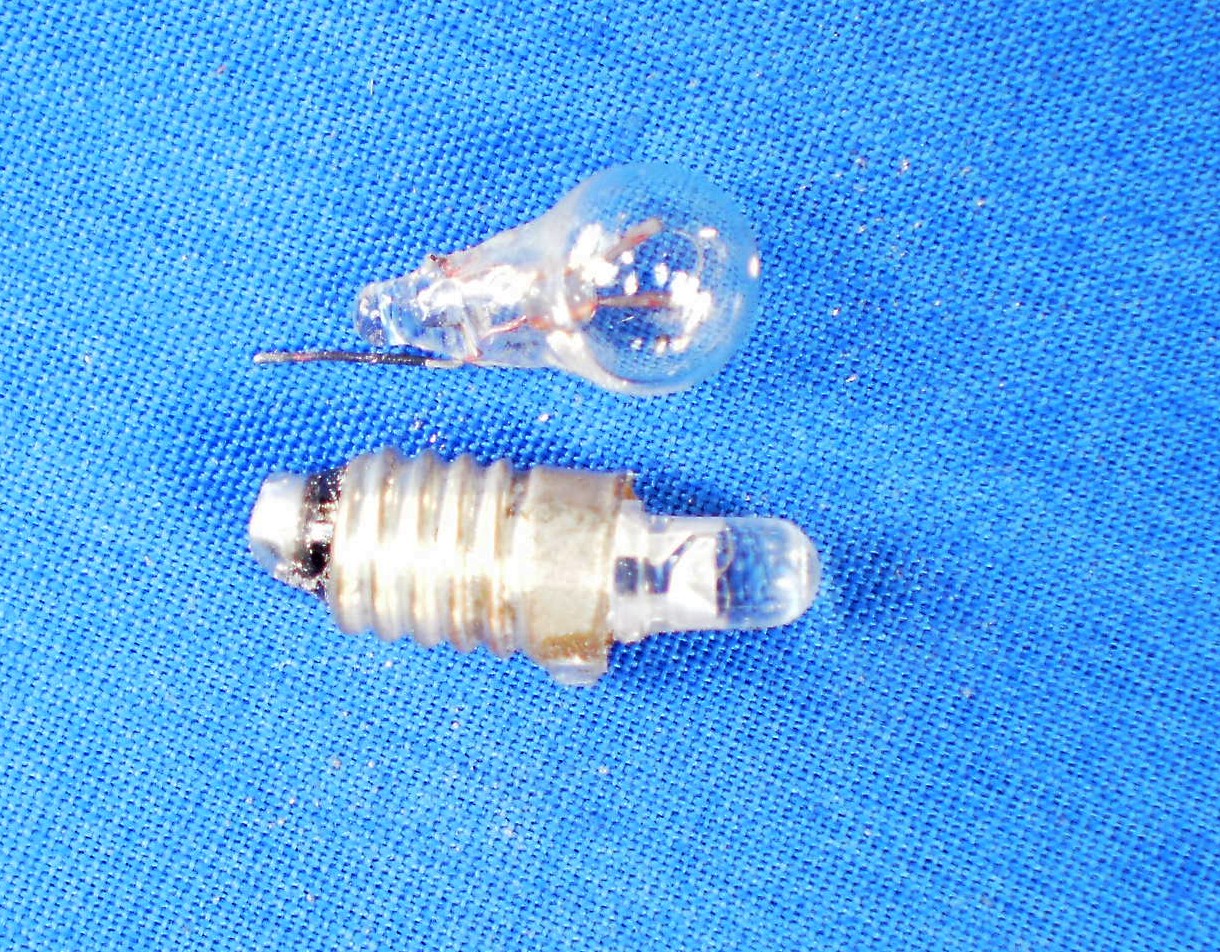
I was recently given one of these valuable units in pieces, as a reward from a kind person for restoring two others to a near-new and working condition. Happily, all the pieces were there except for a working bulb. The preceding post in this series explains how to replace the old incandescent bulb with an LED, using the base of the defunct bulb. Note that the central contact of the base must be connected to the negative of the LED, while in the scale lighting of most sextants, the central contact of the lamp is positive, a matter of no importance in an ordinary bulb, but an LED will not work if connected with the wrong polarity (though doing so will not damage it). An LED also consumes a great deal less current than an ordinary incandescent bulb, so the potentiometer (variable resistor, rheostat) of 10 ohms must be replaced by one of much higher value. This post explains how to proceed.

First, remove the cover by undoing the four screws at each corner (Figure 1)

Figure 1: Remove cover.

Figure 1: Remove cover.

This reveals the wiring to the potentiometer (pot) which must now be carefully unsoldered (Figure 2).

Figure 2: Wires to rheostat unsoldered.

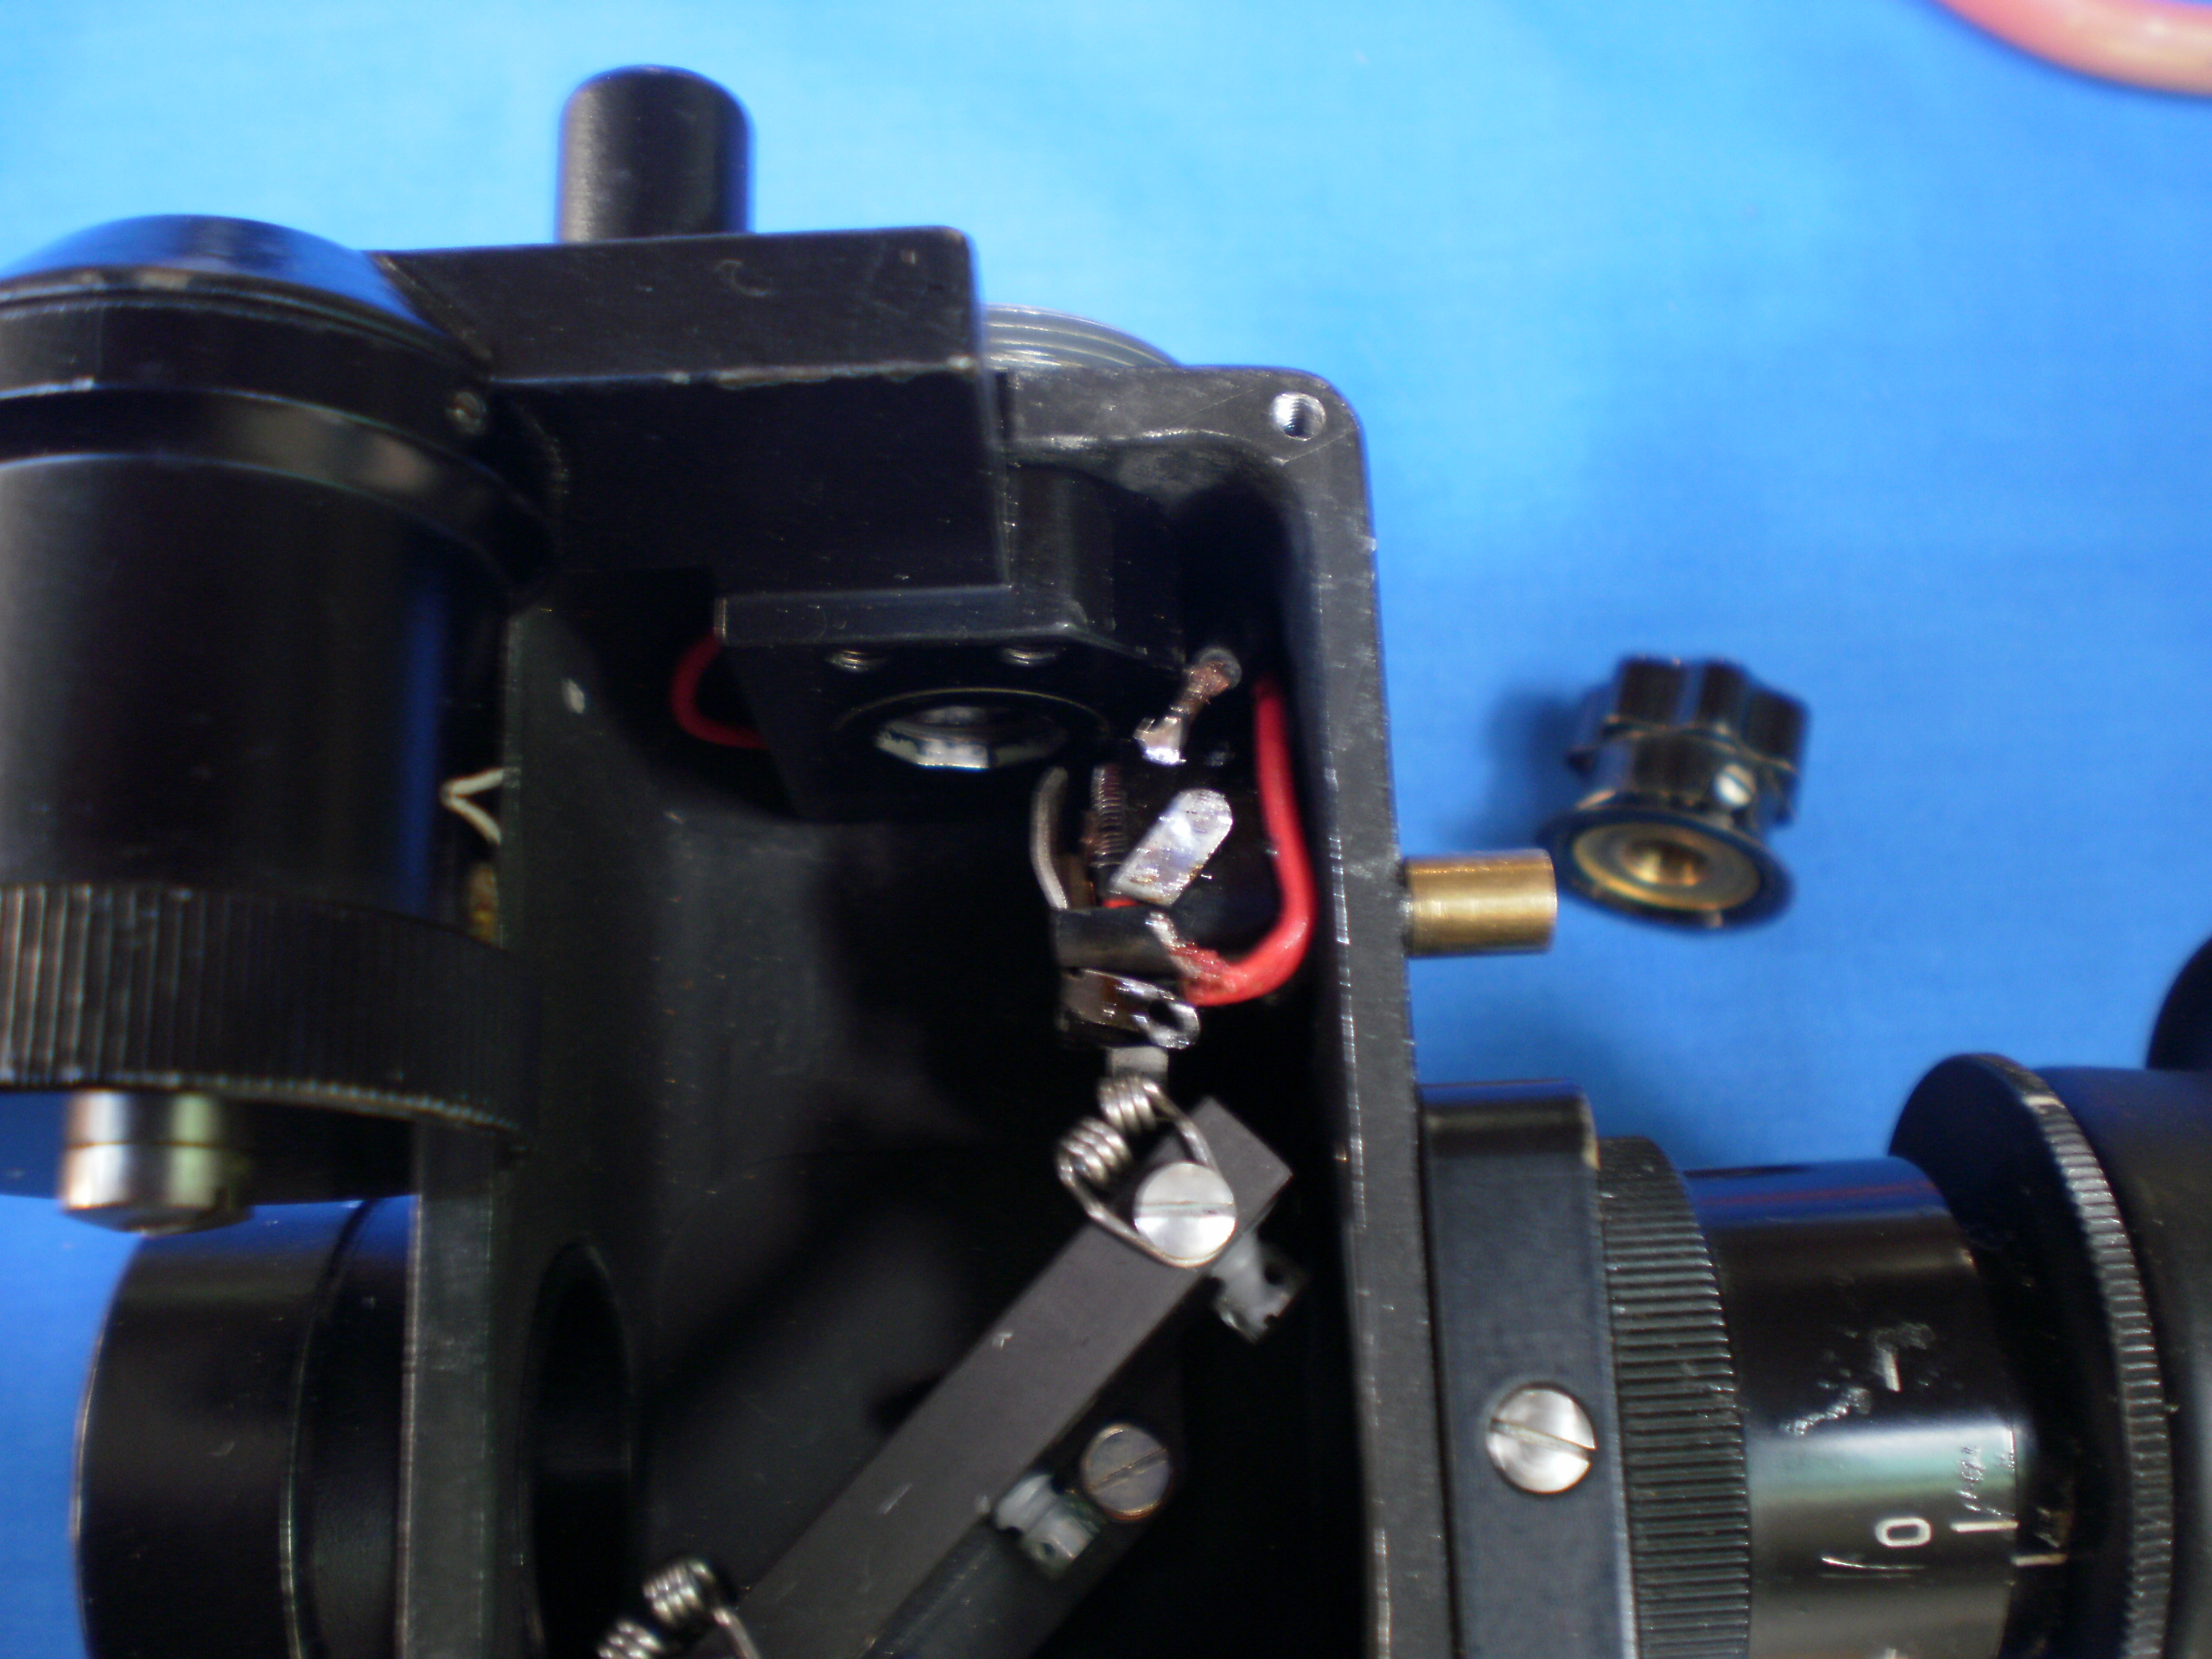
Figure 2: Wires to potentiometer unsoldered.

The knob may now be removed (2 grub screws) to reveal a large hexagonal nut that secures the pot. Undo the nut using a suitable box wrench if you have one. Otherwise it may yield to a pair of pliers, but try not to scratch the case. The new pot can now be put into place (Figure 3). Its spindle may be too long, even after you have inserted spacing washers between the pot and the wall of the case, so you may have to saw it off to length. There is plenty of room for the 16 mm diameter body of the pot.

Figure 3: Replacement rheostat in place.

Figure 3: Replacement rheostat in place.

The value of the pot’s resistance will depend on what use you plan to make of it. If you are only ever going to take sun sights, 1000 ohms (linear, not log) seems to be just right, but for star sights, even turned right down, the light seems still too bright and may wash out even bright stars. Three thousand ohms certainly gives a good range of brightness, but at the cost of reduced sensitivity. I compromised by using a 1000 ohm linear potentiometer and made an adapter to insert between the plug of the bubble unit and the socket of the sextant (Figure 4). The adapter contains a resistor of 1500 ohms to drop the voltage for star sights while retaining the sensitivity of the 1000 ohm pot.

Figure 4: Star sight adapter.

Figure 4: Star sight adapter.

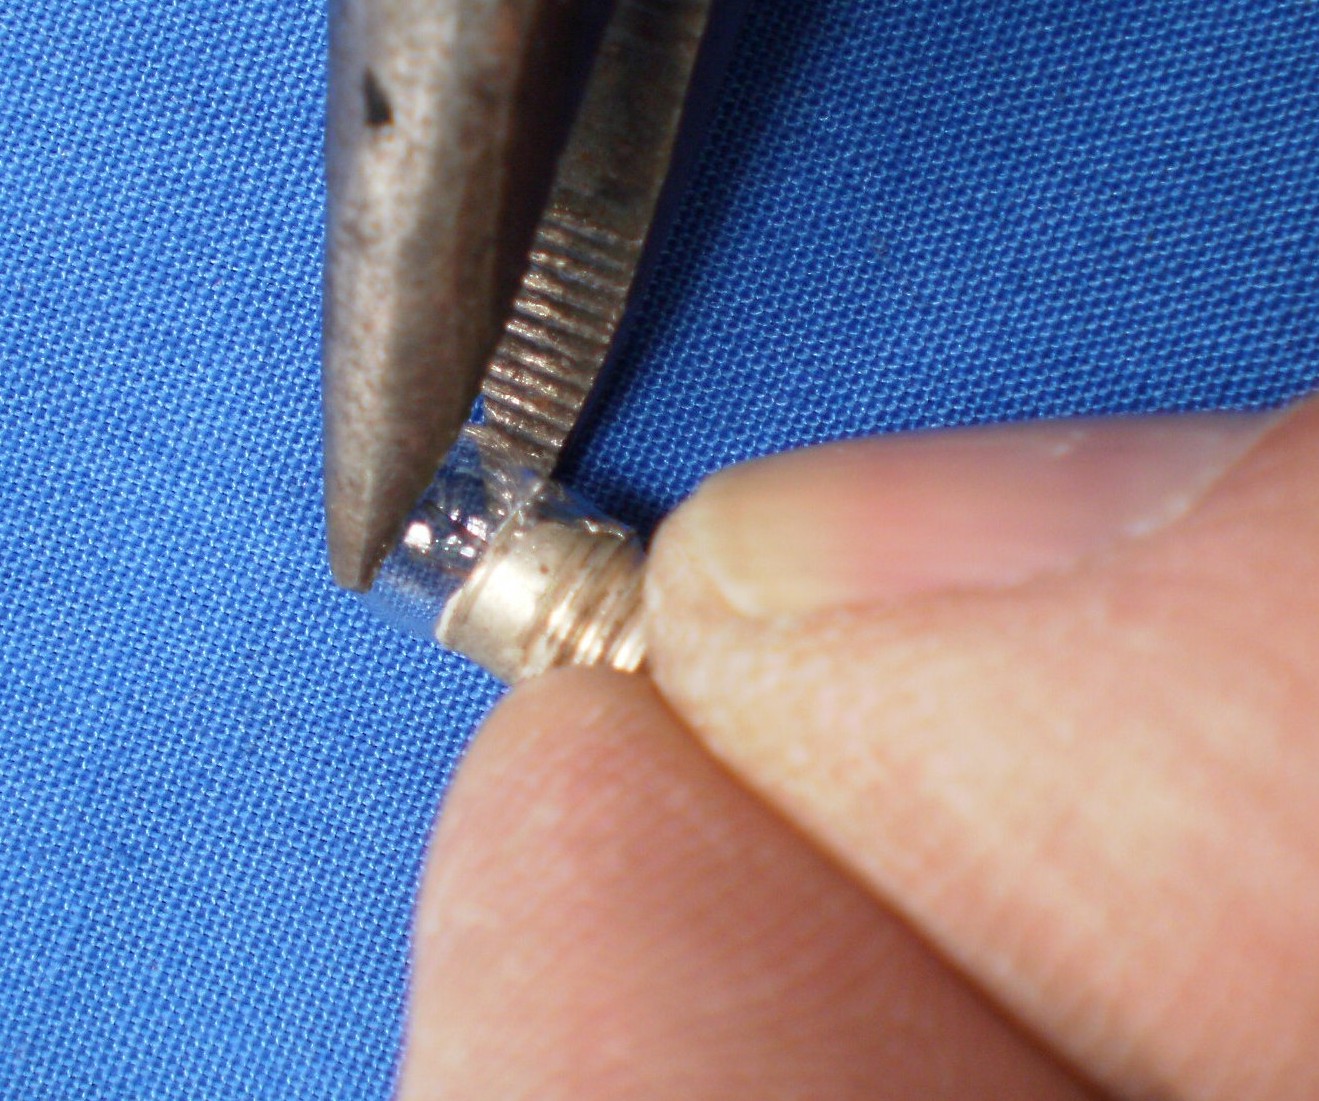
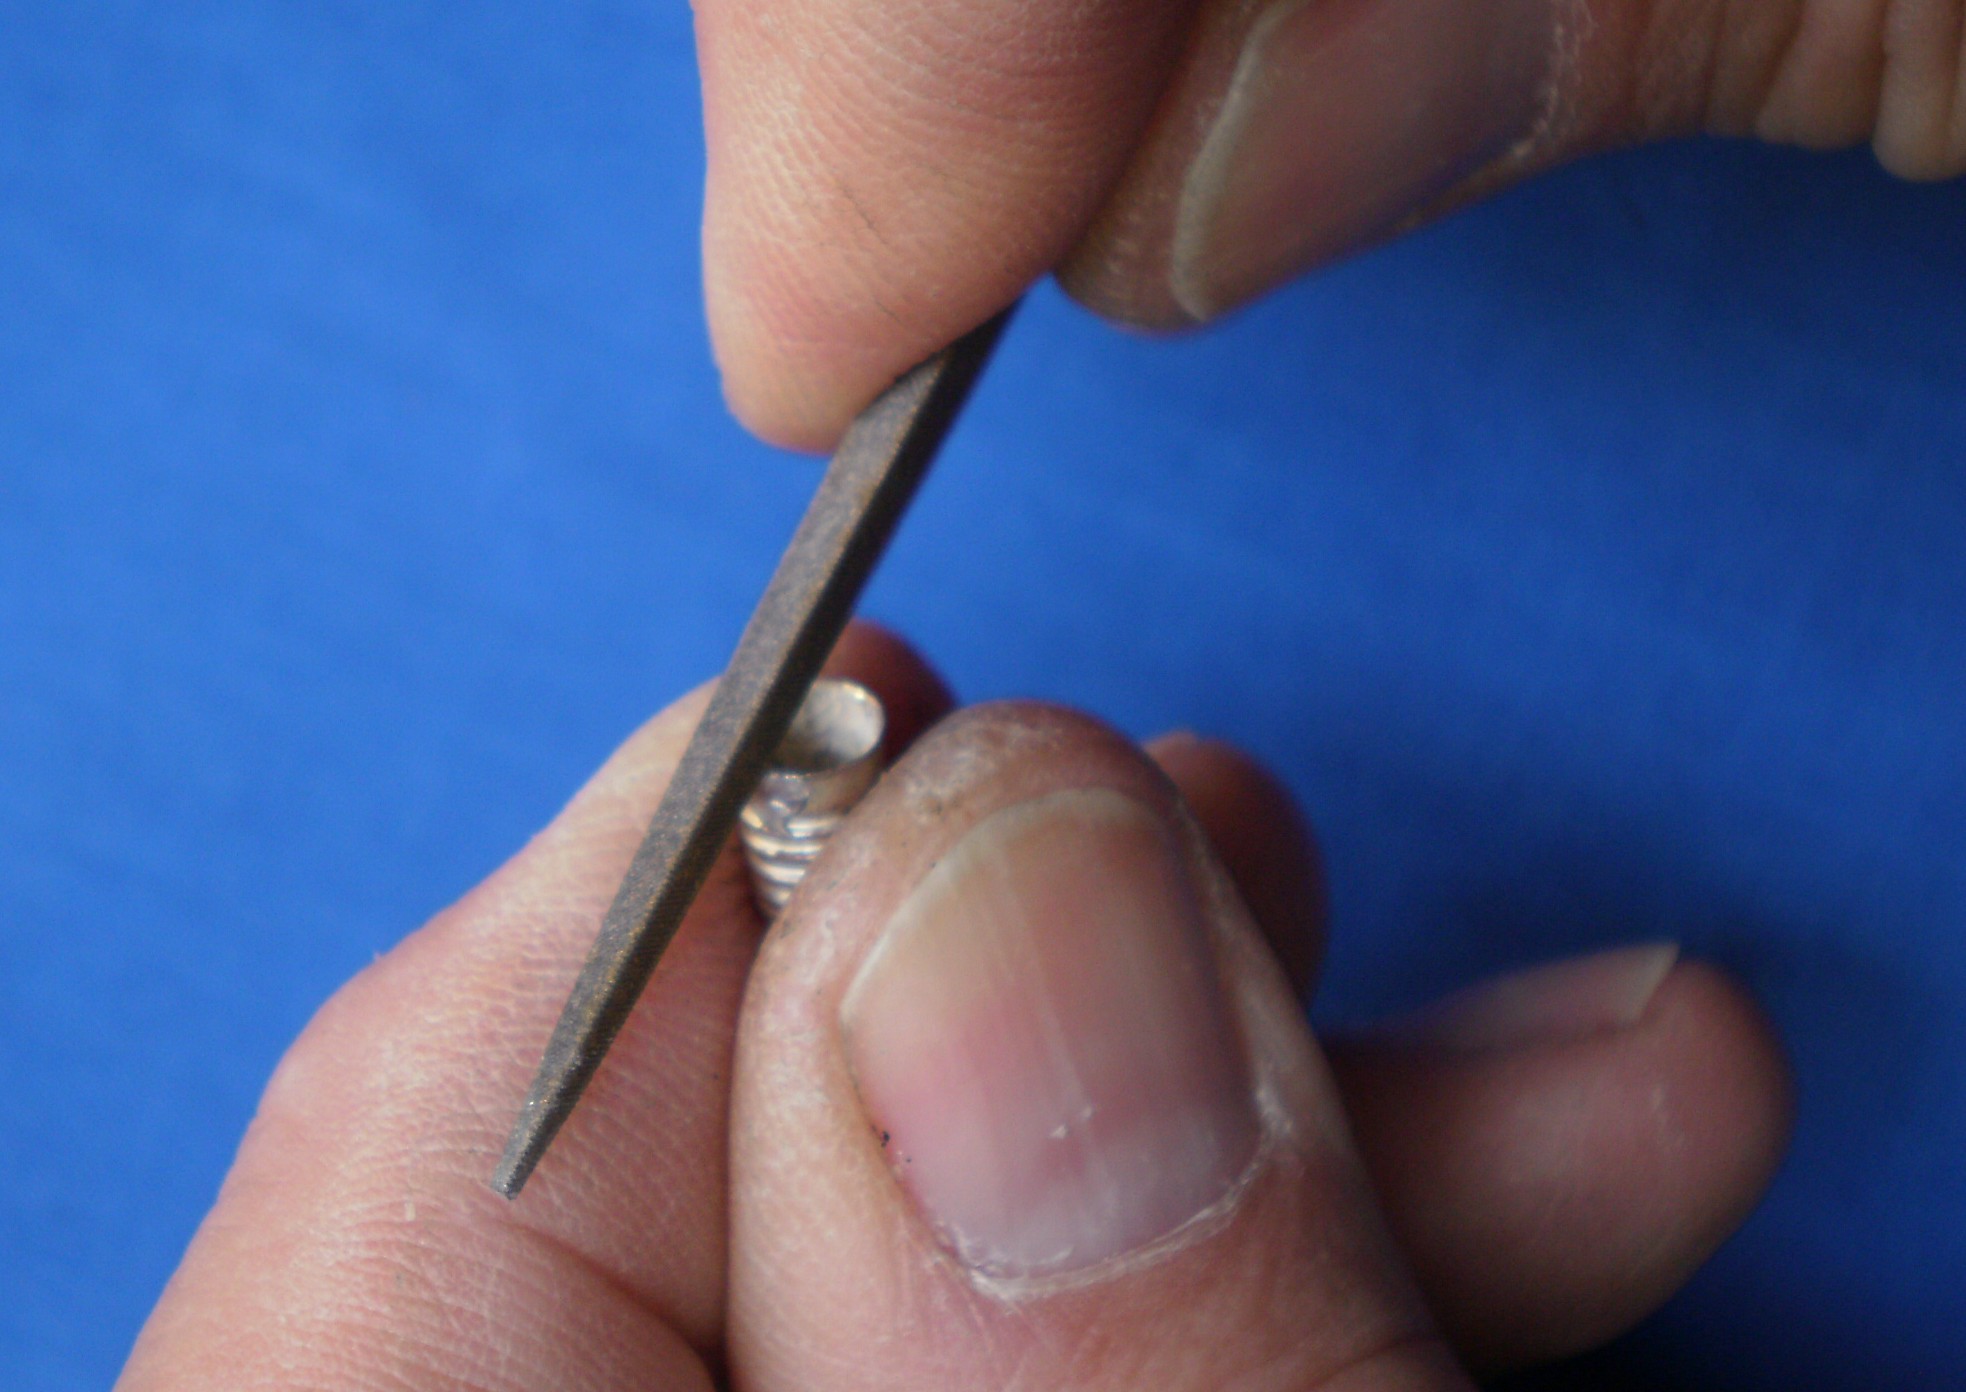
Figure 5 gives a drawing to construct the adapter. Like all figures on this site, it may be enlarged by clicking on it, using the back arrow to return to the text. The 0.5 mm holes are first filled with solder and then the wires of the resistor are inserted and held in place while the solder is still molten. A mounted crocodile clip helps to avoid burned fingers. The plug has sufficient mass to remain hot for quite a few seconds. I forgot this and let go of the still-hot piece with such force that it flew across the workshop to be lost in some dark recess, and I had to make a new one.

Figure 5: Resistor adapter.

Figure 5: Resistor adapter.

The adapter may be left as it is or neatly enclosed in a piece of insulating sleeving (Figure 6), heat shrink for preference.

Figure 7: Finished adapter.

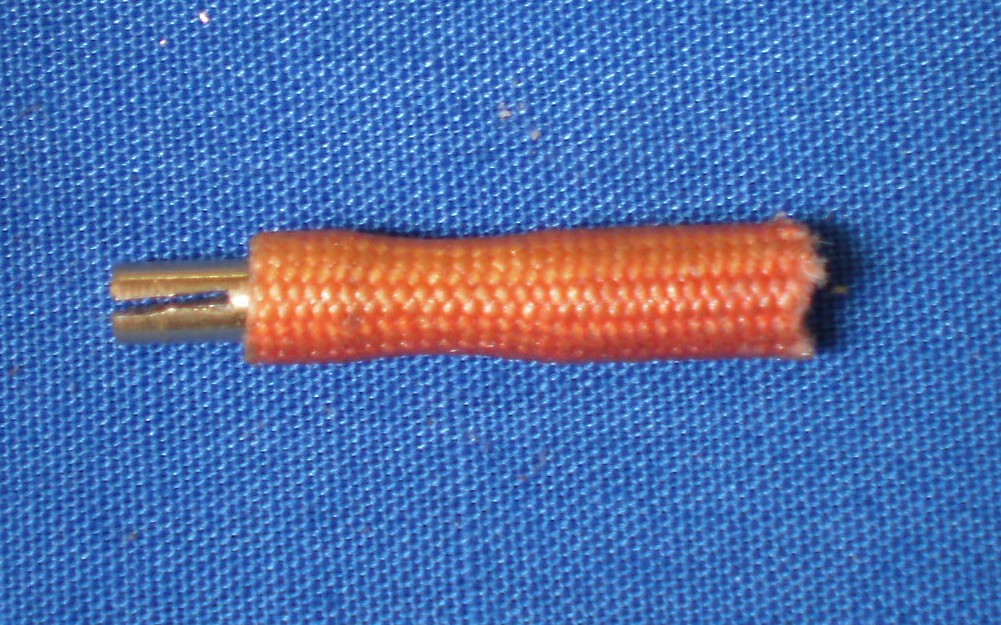
Figure 6: Finished adapter.


Adapting to LEDs 1: miniature screw bases.

4 09 2013

It is nearly six months since I last contributed to this blog. I have been busy persuading reluctant chronometers to work properly and writing posts to my chronometer blog at www.chronometerbook.com. This is not to say I have been ignoring sextants  and I have two or three restorations to write about, soon, I hope.

Incandescent light bulbs are beginning to fade into obsolescence and to be replaced by light emitting diodes (LEDs). At first available only with a rather feeble red light, now a variety of colours, including white, is available at high intensity. Recently, I came into possession of a C Plath professional bubble artificial horizon, my reward for restoring two others to working order. However, mine was lacking a working bulb. Plath sextants lit their readouts using miniature bulbs with screw bases and these are now very hard to find. www.bulbtown.com may have a small supply, but once these are gone I have no idea where others may be had. For this reason, I have looked into adapting the instruments, sextant and its artificial horizon unit, to use LEDs. The base of the bulb is 5 mm in diameter, but fortunately 3 mm diameter LEDs are available.

To experiment, I bought half a dozen 3 mm LEDs with white output of 4000 mCd (millicandelas) with a supply voltage of 3.6, and with 35 degree angle of radiation rather than the more usual 11 degrees. At full output, 4000mCd is uncomfortably bright and I chose the larger output angle to give a wider and more even area of illumination within the bubble unit. It was also very adequate for the scale illumination.

The first step is to salvage the base (Figure 1). Since the bulb was burned out, I grasped it with pliers, intending to crush the glass, but in the event  the globe came free intact, except for one of the wires.

Figure 1: Removing old globe.

Figure 1: Removing old globe.

Figure 2 shows the wire remnants being removed with the aid of a soldering iron. To avoid burned fingers, It is helpful to have a third hand in the form of a mounted crocodile clip to hold the base. When the central wire has been removed, a quick puff of air while the solder is still molten will leave a hole for the new central wire.

Figure 2: Removing remnants of wires.

Figure 2: Removing remnants of wires.

It is then necessary to remove old cement and a scriber, preferably carbide tipped, can be used to chip it away. Figure 3 shows the process complete.

Figure 3: Salvaged base.

Figure 3: Salvaged base.

A notch must now be filed or sawn into the edge of the base to accept one of the LED wires. Figure 4 shows this being done with a triangular Swiss file, sometimes called a “three-square file” for an unknown reason. A junior hacksaw blade will do the job just as well.

Figure 4: Cutting notch for positive wire.

Figure 4: Cutting notch for positive wire.

The notch must be deep enough so that when the wire is bent at right angles close up to the base of the LED, that latter will sit just inside the salvaged bulb base. This insures that the tip of the LED will project no more than the original globe (Figure 5). While an incandescent bulb will work whatever the polarity, an LED will not. In my fine old C Plath sextant with the batteries inserted positive upwards, the central contact of the base in the scale lighting  is also positive, but in the bubble unit, it is negative, so if you have both, the LED lamps will not be interchangeable. However, since the life of an LED is very long indeed, once fitted, they can be forgotten unless they work loose in their holders. At any rate, the longer lead of the LED is positive. As Figure 5 shows, the correct lead is selected to fit in the notch and the other lead is led straight through the centre.

Bulb adapt 006

Figure 5: Leads in place.

Figure 6: Leads soldered.

Figure 6: Leads soldered.

Figure 7: LED adaptation alongside original globe.

Figure 7: LED adaptation alongside original globe.

If, as in Figure 7, the LED is slightly askew, it can easily be persuaded to point in the correct direction. The very cautious may secure it with a blob of Araldite or similar, but the leads anchor it very securely and no further action is really necessary.